Thursday, 24 December 2015

Mars Alpha Pattern Warlord Battle Titan (11)

I think this section of the painting is going  to take a bit longer than the legs. There is a lot more details on the torso, none of which i'm intending to leave out.

Fist up though, an undercoat in Army Painters Plate Metal.


As with the legs i used Vallejo's Gunmetal to create areas of shade on the torso. Here shading was added under the cowling of the head.


Again under the arms and the areas where the armour panels will be on the torso.


Above the door of the access hatch and the deep corners.


There wasn't much blue armour paneling on the torso, but what paneling there was needed completing before the rest of the details were painted.


To my dismay there is still quite a lot of trim to be painted on the torso as well! Never mind, keep the brush moving and keep focused on the end result! Dispite the effort, i'm still really enjoying this project.


More soon, but in the meantime, happy Christmas and a happy new year everybody!!

The GunGrave

Friday, 18 December 2015

Mars Alpha Pattern Warlord Battle Titan (10)

Well that's a process I'd quite like not to repeat for a while!! 2 coats of the base colour, wash, then highlight on ALL THAT TRIM! It will be worth it though.


Blogger and its sides-ways ways!


Once the panels were dry i went straight onto gluing them onto the legs. I replicated the white striping that is on the Forge World Warlord, which initially i wasn't sure about. I'm pleased i ran with it as i think it would've been to much blue otherwise.


This is what i was left with after the full assembly. It looks much  more impressive now!


Once I'd done all that i realised i forgot to add the small armour plates that go between the toes! I managed to get them attached without any problems though. They finished off the feet quite nicely.


I will be going back to the pistons and adding a bit more grease and grim. I have a recipe that i want to try with some oil paints at some point. now I'm done with the legs though, its straight onto the torso!

The GunGrave

Monday, 14 December 2015

Mars Alpha Pattern Walord Battle Titan (9)

Just a quick update today. I've been prepping the armour panels for painting (man that's a lot of gold trim to go down!!) 

I went with the same colours as the Reaver, the Legio Astorum Legion. For the blue i went for the mottled effect to match the Reaver. I also happen to think it looks rather cool!


The reverse sides of the panels were sprayed with Vallejo Gunmetal as some of these areas would still be visible after being stuck on.


The other area that needed a bit of attention before i started on the trim was the knee plates. These would of course look great with a bit of extra detailing, so the left knee was done in yellow.


The right was quartered in white and turquoise. Both knees will receive Legio Astorum transfers when its finished.


Next up is the mammoth task of the gold trim....ergh...

The GunGrave

Thursday, 10 December 2015

Mars Alpha Pattern Warlord Battle Titan (8)

With the build pretty much complete its time to start painting! The only bits i have left to assemble are the head (which needs painting first) and the armour panels. These of course will also need to be painted before gluing in place. 

This thing is a monster to paint, so i divided to divide it into sections; legs, torso, weapons and head. Each section will be completed in its entirety before moving onto the next. I'll be starting from the bottom and working my way up, so first up its the legs.

The legs were first undercoated in Army Painters Plate Metal.


I then sprayed the legs with Vallejo's Gunmetal to darken down the colour.


I then sprayed the apex's and prominent areas with vallejos Silver. This was to create some shadow and highlight on the legs, as i thought this was far to large an area to wash down with Nuln Oil.


I moved onto some of the details next. The piston housings were painted bronze, and the trim was picked out in gold.


As you can see, there was quite a bit of gold trim on the toes! As they were metallics, 2 coats were needed before the washes to get good coverage!


Finally i washed the bronze and gold in Seraphim Sepia. I didn't add highlights to these pieces afterwards, as i wanted them to look dark and oily.


After washing the pistons i added some more silver to brighten up the areas where the pistons had been most active. This brightness helped to break up the darker shades.


Next up is  the armour panels!

The GunGrave

Tuesday, 8 December 2015

Tyranid Terrain: Spore Chimney

I've decided to take a quick break from the Warlord to cleanse my hobby pallet a bit, so i've returned to  my other love; Terrain. 

I always intended to make a second Spore Chimney for the Tyranid Terrain set (see the first Spore Chimney here) I had all the bits, so i started putting it all together. 

I started with a polysturene ring glued to an MDF base. I cut out 3 wedges around the edge where the capillary towers will fit in. 


Next i added the end of some plumbing pipe to the center of the ring. This will provide the structure for the mouth of the chimney.


A large polystyrene cone was then quartered and three of the sections were glued to the base to form the capillary towers. The top of one of the cone quarters broke off, but i'll just model it as battle damage!


With the basis of the structure complete, i moved onto the clay work. I coated the outside of the pipe piece in clay to give it some texture, then did the same for the polystyrene ring.


A bunch of tenticles were made using my tenticle maker to make it Tyranidie! (new word there, feel free to use it!)


Texture was added to the inside of the capillary towers using PolyFilla.


The outside of the towers was covered in clay and shapped into typical Tyranid chittin!


Plenty of bullet and shell holes were added to the chittin, the last efforts from the worlds doomed defenders!


Thats as far as i got for now. I took the oppotunity to effect some repairs on a couple of exsisting capillary towers that had got a bit battered through use!


I'm going to try and break up the Warlord project a bit more with projects like this to make sure i maintain my enthusiasm! More on this soon!

The GunGrave

Friday, 4 December 2015

Mars Alpha Pattern Warlord Battle Titan (7)

After completing the pins for the Volcano Cannons i quickly moved onto the shoulder mounted Laser Blasters. Now I've already seen a missile pod type of weapon for the warlord on the Internet so no doubt there are more shoulder mounted weapons coming. This of course meant more magnets!!

The base of the Laser Blaster is a 'cup' which sits on top of another cup-like socket on the shoulder. There is a 'male' protrusion on the cup of the Laser Blaster which needed to be sanded down. I needed to squeeze in two 2mm thick magnets between that and the cup  on the shoulder, so quite a bit needed to go. 


Once done i used Araldite to stick the magnets on.


While the glue dried i actually built the Laser Blasters! Not quite as beefy as the Volcano Cannons but still impressive.


So that's the last of the weapons done! Next up was the Void Shield Generators. I wanted to magnetise these in the same way i did on the Reaver, so they can be removed and replaced as shields were lost/restored.


Some tiny 2mm magnets were glued to the base of each Void Shield Generator. nothing stronger would be needed, these are very light bits of resin. 


Thankfully, the magnets fitted in perfectly into the recesses on the Warlods back, so no more drilling to make the magnets fit.


This is how it looks so far!! Its a behemoth!


Not long until painting can start! Can't wait to see this guy finished (as I'm getting quite fed up of building...!)

The GunGrave

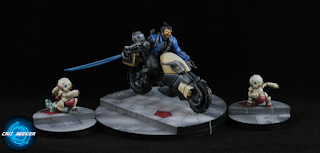
JSA - Yojimbo!!

He has a name you just have to shout every time you activate him! The mad motorcycle monster himself, Yojimbo! The JSA have very limited...