Friday, 17 December 2010

Legio Custodes - Yeah, Thats Right!

Since i first stumbled upon Scibors Monstrous Miniatures website I've been in love with Custodian models, as they created some magnificent conversions for these guys! It was then that i vowed to make my own Custodians one day (probably in the far distant future!)

Recently Scibor introduced a few new products into their Conversion Parts range, which included nearly all the parts needed to make Custodians very similar to their conversions! I nearly wet myself with excitement, my dream may finally come true! So i eagerly purchased the required parts: shoulder pads, helmets, greaves, and shields. The only bits missing are torsos, which they havent released (or if they indeed plan to release) yet. The plan was simple: use a normal Space Marine as the basis of the conversion, add the parts from Scibor, and then somehow convert a suitable torso. Easy right?? WRONG!!

The problem was that once i added the conversion parts, they made the whole mini look stumpy! This is what a Space Marine Dwarf looks like!


So i needed to make the Space Marine taller. I mulled this over for a few hours and came up with 2 potential ideas, both of which would be created as a prototype. Firstly i could raise the Marine at waist level using putty between the legs and torso. I wouldn't need to worry about detail here, as the waist would be covered by a large tabard. Its a bit difficult to picture, but once the greave was added again, it became easier to visualise as a viable option.


The second option is much more labour intensive. I wanted to insert a 'raiser' at some paint in the legs, extending the legs themselves and making the whole model taller. I decided to to this on the lower portion of the leg, so that any imperfections could be covered by the greaves.

Firstly i removed the bottom part of the legs and feet at around the mid-shin point. I think a vice is essential for this! Believe me, i tried it without and nearly lost a finger!!


Next pin the parts back together leaving the desired amount of space between the leg parts. I went for a 2mm rise on the model. This doesn't seem like a lot but i didn't want to go mad, otherwise id end up with a lanky Marine!


Once that's done just fill in the gaps with putty (i used Milliput). Once dry i tried the greave on the leg, and was impressed with the result, making the model look much less cramped.


You've probably noticed that I'm only worrying about the greves at the mo'. Reason being that i think that this is the source of the Dwarf Marine Syndrome. Sort out the legs, and the rest of the model will look as it should.

So I've got 2 possibilities, both workable. Tomorrow once the putty is properly dry, I'll do a mock up with all the other bits added to get a proper look; arms tabards the lot!

So that leaves me with one more problem, the torso! I thought that this would be quite straight forward, but this really gave me trouble! The normal Space Marine torso wouldn't cut it, as its not nearly ornate enough, so a new one was definitely needed. It took me ages to get the right shape and design. Design wise, I'm gonna have to build it up bit by bit. I just don't have the skills to create a whole new one off the bat. So i just got the shape and boarder right, and then created a press mould for it. Once this is perfected ill begin adding additional designs and pimp it up a bit!

(this pic was meant to be landscape, couldn't fix it!)

Phew, well believe it or not i actually found time to press on with the Khornate stuff for my buddy Rob. I finished off all the infantry first thing this morning (no pics, but its nothing to special) and also do a little bit on his Land Raider. I added a few snarling maws to the lascannon barrels, and a bit of 'scuplting' on the assault ramp. Now i say 'sculpting', but this is definitely the weakest part of my hobby! So i took the opportunity to practice on someone else's models!! I must have become tainted!


All i did here was apply some putty to the top of the assault ramp primarily to cover the imperial eagle underneath. I added a Khorne icon to this and then felt all creative and decided to sculpt some learning faces on the hull! My learning faces were a disaster, so i settled on leering skulls instead! Even these arn't that great, but once its all dry and painted it ll look a lot better (i hope!)

So that's as far as I've got at the moment. I'm really excited about this project, and i really hope i can pull it off! I think the key is not to rush, take the time, and apply the effort! It'll be worth it in the end! Next up is the prototypes!

Laters

Thursday, 16 December 2010

Giving Khorne a Hand (Shush, Don't Tell the Emperor!)

Having a lack of models to paint has made me look further afield to try and find something to do! I was at my gaming club yesterday and I noticed that a mate of mine hadn't made much progress on his World Eaters army, and in fact didn't intend to in the near future! This is where i offered to paint up his army while hes at home for the Xmas period! I offered to paint it up to a good tabletop standard, so he could add extra embellishments later if he wanted to.

So today I've been cracking on with the troops, and got 5 Bezerkers done. Theres another 5 in the background which are nearly done to. Then its onto the vehicles.


Another bonus of not having much to do is tying up some of the loose ends of my Kreig lists. So I've been re-arming a few Kriegsmen ready for my Armoured Regiment list which is only 3 Chimeras short of completion. These guys will actually receive a full repaint, as they're some of the first Krieggy Boys that i ever painted, and the techniques are a bit out of date!


I've also been doing a bit on my terrain pieces that i started the other day. I said that i wanted to go for a more minimalist look with these pieces, making it easier to place models in them. The more i looked at them, the more unfinished they felt, so i backtracked a bit and added some more details and rubble!

For the Administratium i just added some large pieces of rubble to break up the open areas a bit.


For the Pegasus piece i did something a little different. I thought that the tops of the columns were a bit to cleanly cut to be destroyed by a large blast so decided to correct this. A bit of roughly applied Milliput sorted this, giving the tops a nice ragged appearance. I also added some Soldering Wire to represent the rebar support. While i was at it, the holes in the sides of the columns were also filled with Milliput and then sanded flat once dry.


So that's what I've been up to hobby-wise! We've got really bad snow forecast for the next few days, so with any luck I'll be snowed in and unable to got to work. Argh no, snowed in for a few days with my 40K and my Xbox! How will i cope!!

Laters

Monday, 13 December 2010

Rise of the Kabal: Archon Conversion

A few posts back i outlined a simple conversion of an awesome model i picked up from Studio McVey miniatures; that conversion was realised today!

If you missed the last post the miniature in question is this one, Y'Sidyra, a great looking mini all on its own (though i probably wont be keeping the name!)

Little work would be needed to make it fit into my Dark Eldar army, although i would need to make some minor conversions to arm it with the correct wargear. These are Splinter Pistol, Venom Blade, and a Phantasm Grenade Launcher.


The right hand punch dagger was carefully removed and replaced with the Splinter Pistol, making sure to show a little of the pistol grip on the underside of the hand. The left had punch dagger was left in place to represent the Venom Blade. The Phantasm Grenade Launcher was simply filed down a little in order to fit snugly on the Archons back.

Now having such a dynamic looking mini as your Archon demands some careful positioning on a suitable base! The Micro Art Studio 40mm Snow Bases that i ordered a few weeks back fit the bill nicely. The Archon is currently stuck onto the base with some blu-tack until its fully painted. This is because in going to use a bit of clear plastic from the tip of a flying base to elevate the leading leg to give the Archon some 'air', accentuating the models dynamism (wow, some big words there!!)

So there you have it! As soon as i get some more paints in I'll get this bad boy painted, probably in a bluey scheme to match the rest of the army.

Laters

Sunday, 12 December 2010

Product Review - A Quick Look at Pegasus Terrain

I've been aware of Pegasus Terrain for some time and I've always been a fan; theres even a few pieces at my gaming club. As I've run out of models to paint for the time being i decided to pick up a set and see what i could do with it.

The answer is 'not much'! Now that's not meant to be as negative as it sounds! These are great looking building kits, right at home in a 40K Gothic battlefield, but they arnt as detailed as the GW kits. In a way they don't really need to be, but i think you'll see what i mean when you see the pictures!

Onto the kit itself. Well this is a snap-together kit, and requires little or no glue (though i used a little on the floors for stability). The pieces are made of plastic and are very chunky! The Gothic architecture is great but the scale is just a little large for 28mm minis, not that its really noticeable. The big plus is they're cheap! This kit cost me £14 off eBay (plus a £4 postage charge!) My only real criticism is the holes that are left in the columns once its assembled. I think these are there so that you could combine multiple kits if you wished, but unfortunately it doesn't provide the right parts for you if you wanted to make the building on its own. I'll be filling these in with Milliput later.

Now i haven't done much with the base of this building, and theres two reasons for that. Firstly the Mecanicum building was a bit to cluttered around the base making model placement a little hazardous, so i wanted to avoid that! And secondly i wanted to see how it would look based up on its own, no frills! This is the work in progress. I may add more to this kit later on, but for now i think I'll paint it up as it is.


You can see how big this 'small' kit is in this pic. Its mounted on a 1x1ft base, and easily takes up most of this space.


So in conclusion: a thumbs up and highly recommended! They look great, they're chunky and substantial, and they're cheap!! After Christmas i may see what i can make by combining multiple kits on a 1x2ft board!

As i was in terrain mode, i decided to crack on with a GW Administratium building. I wanted this one to be really tall and give my modular game board a bit of height. In contrast to the Pegasus building, i wanted to accessorise this building a little and give it a bit more character. I thought that the layout of the building would've made a great place for a last stand or forward observatory. To promote this theme i added a few sandbags to the first floor and some barbed wire on the base. Not to much, but enough to give the desired impression!


I used a piece of cardboard to make a corrugated iron sheet here:


The sandbags were made of Milliput. Usually i use Green Stuff for this, but the Milliput is much more malleable and easy to work with, taking on a clay-like texture when wet. Plus it only takes 2-3 hours to dry. I'm finding that I'm using this more and more in my modeling and would choose it over green stuff these days.


I added some other details to this building, some copper piping and plastic T-Bar.  These make great additions to the GW building kits, giving them that extra something!


Next then its onto painting. I'll be painting these the same way as the Mechanicum building, undercoating them in dark grey and painting a few details. more on that next week!

Laters

Wednesday, 8 December 2010

Rise of the Kabal: First Kabalite Unit Complete!

I've been painting these guys on and off for the past week or two which is why it took so long to get them done! I added the finishing touches to the final five members today.

The new additions, including a Splinter Cannon


The full ten man squad


Unfortunately, due to an unusual bout of sensible-ness, I'll not be buying any more (or MANY more) models before Christmas. My dam car insurance is up in January, so on top of the Xmas bill, its gonna be an expensive month! This means the Dark Eldar will be on hold for a while, but i do have a few Krieg Armoured Regiment bits on the back burner at the mo' which I'll probably be getting on with, so watch this space!

Laters

Thursday, 2 December 2010

Product Review: Zuzzy Terra-Flex Battlemats

I saw these on the blogosphere a while back and ordered some samples from Zuzzy's website, which finally arrives from the States today!

These are Latex textured battlemats dubbed Terra-Flex by their creators. These caught my eye in particular because they can be rolled up like a poster and therefore take up very little storage room. Lack of storage space is a particular issue for my gaming club, so i thought that these would make an ideal alternative to the bog standard green gaming mat.

There are 4 types of mat available, and the samples i was sent are of the Broken Blacktop variant. It comes in a dark grey colour and is heavily textured, but the beauty of these mats is that they are fully paintable.


Vostroyan with cityscape base:


Now, depending on how you paint them, the paint job shouldn't crack when rolled up for storage. Now by paint job i think they mean you shouldn't be throwing your best Golden Daemon standard of painting at it, but a few light coats of spray paint instead!

Below is the result of two light coats of Army Painters Desert Yellow primer. Paint seems to adhere to the mat really well, and once it had fully dried, i rolled up the sample in a tight roll to see what would happen to the paint. I was pleased to see that there was no cracking or flaking of the paintwork. Pass!


An Elysian Drop Trooper with Desert Base:


As the paint adhered really well to the mat, i wanted to see how far i could go with the paint job. I washed a small section of my desert mat with Devlan Mud and then drybrushed some Kommando Khaki over the top. I didn't go nuts with the painting, but i just wanted to see how much extra depth i could add if i wanted to.


Elysian on the newly painted section:


Again i was pleased to see that the paint took well to the surface, and no cracking or flaking was seen once the mat was rolled up.

Finally i wanted to check its overall durability! With no scientific of clever method of doing this, i just pulled it apart! I gave it a good stretch, tried to tear the edges with my hands and just chucked it about a bit! Again i didn't go TOO nuts, I just gave it a good enough kicking to simulate club level wear and tear! There was some slight warping on the extreme edges of the mat from the tear attempts, but aside from that, the mat was undamaged! Another pass!

There is only one downside to this mat: PRICE! Now if you live in the States its not to bad. If you live in the UK like me, then the price  of postage is nearly as much as another 6 x 4 battlemat!!! A total spend for one of these mats to ship to the UK would put you back £57.30! Now they're good, but are they THAT good?? I'm not so sure!

In conclusion: great mat, great product, naff price. If the postage to the UK was more reasonable, then i may be more inclined to get one, but it is still around £35 for the mat alone. Common Zuzzy, give your cousins across the pond some more thought and you might tap into a lucrative market! But for the time being, i think I'll be giving it a miss!

Laters

Wednesday, 1 December 2010

The Final Valkyrie Base - Water Effect Tutorial

Just got back from my gaming club after taking the Elysian list out for another spin. I'm pleased to report another victory, after a pretty one sided battle with some Death Guard! The more i play this list the more it becomes my favorite!! I guess i should wait until i loose a few before making a final evaluation, early days!

I completed the final Valkyrie base this morning. As described in the last port, this base will resemble a cracked wadi with a small stream running at the base.

The paint scheme of the wadi itself was simple and applied quickly. The water is what i really wanted to focus on. In order to do this i referred to Imperial Armour Masterclass, as there is a nice piece on creating depth in pools of water. I've documented here how i went about it, but i have to admit it didn't turn out as well as I'd hoped! I'm not unhappy with it, but i think it could be better!

The colours i used for this effect are: Scorched Brown, Dark Flesh and Beastial Brown, as well as a wash from the old-school Brown Ink, in that order.


Firstly i did the obvious and mask off the areas that i didn't want to paint, as id be using an airbrush.


I then carefully applied the first colour Scorched Brown to the whole riverbed using an airbrush. This colour will represent the deepest parts of the stream.


I then airbrushed the Dark Flesh onto approximately half of the riverbed. I was careful at this stage to blend the colours as seamlessly as possible. I had to apply about three coats Dark Flesh to get the right shade, as the Scorched Brown was a little dark! This colour represents the mid-depth section of the stream.


The final colour Bestial Brown was then added to the riverbed closest to the shoreline (not the base of the wadi) This colour represents the shallowest area around the stream, and was applied to about a quarter of the riverbed.


Next i added some watered down Bestial Brown to the extreme edge of the shoreline using a paintbrush. This will represent the shallowest part of the shallows!! Again i was careful to blend the colours together as much as possible.


And FINALLY, the whole riverbed was washed in old school Brown Ink. This stage really ties everything together, and the colours seem to blend together really well! By now you should get the impression of deep water at the base of the wadi and shallow water at the shoreline.


To complete the look i added some Citadel Water Effects to the riverbed. This is the end result of about three layers of Water Effects ensuring the brushstrokes follow the direction that the stream would roughly follow.


And there you have it! Again, this didn't turn out quite the way i wanted it to, but im not to unhappy. Now i look at it i wished i used a lighter set of colours, something more sandy rather than muddy! Anyways i hope some of you find this interesting, and i really do recommend investing in Imperial Armour Masterclass; its got a wealth of painting techniques that can transform your models!

Laters

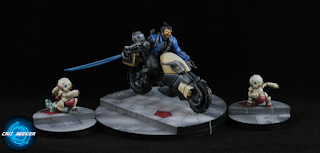
JSA - Yojimbo!!

He has a name you just have to shout every time you activate him! The mad motorcycle monster himself, Yojimbo! The JSA have very limited...